Table of Contents
ToggleFailing window seals don’t just look bad, they quietly drain your heating and cooling budget while letting moisture creep into the space between glass panes. If you’ve noticed condensation collecting inside your windows, drafts around the frames, or visible cracks in the caulk and glazing compound, your window seals probably need replacement. The good news is that resealing windows is a manageable DIY project for most homeowners. You don’t need to replace the entire window: a proper window seal replacement restores insulation, improves appearance, and can cut energy costs. This guide walks you through why seals fail, what to look for, and how to do the work yourself, safely and right.
Key Takeaways
- Window seal replacement is a manageable DIY project that restores insulation, improves appearance, and can significantly reduce energy costs without replacing the entire window.
- Failing seals show clear warning signs including visible cracks in caulk, condensation between glass panes, drafts around frames, and increased heating or cooling expenses.
- The window seal replacement process requires removing old caulk and weatherstripping, cleaning thoroughly, applying new materials in dry conditions above 50°F, and allowing proper cure time before exposing windows to heavy rain.
- Using exterior-grade caulk (silicone lasts ~20 years versus 10 for acrylic) and maintaining proper bead width of 1/4-inch prevents moisture intrusion and ensures a long-lasting seal.
- Common mistakes like skipping prep work, applying caulk in cold or wet weather, and ignoring structural damage cause seal failures, so careful planning and patience throughout the process are essential for success.
Why Window Seals Fail and When You Need Replacement
Window seals exist to create an airtight barrier between the glass panes and the frame. Over time, weather exposure, thermal cycling (constant heating and cooling), and UV radiation break down the materials. Caulk and glazing compound, the putty-like compounds used to seal windows, harden and crack. Rubber gaskets and weatherstripping compress and lose elasticity. Moisture seeps in, condenses between the panes, and leaves permanent marks that no amount of cleaning removes.
Most modern windows use double-pane or triple-pane construction with a gas fill (usually argon) between layers. When seals fail, this gas escapes and moist air takes its place, reducing insulation value. In some cases, a failed seal means the entire sash or glass unit needs replacement: in others, you can reseal the frame and edges.
Here’s the key decision point: if you see condensation inside the sealed glass unit itself, the unit is compromised and likely needs replacement. If the problem is around the frame edge, external caulking, or weatherstripping, resealing is your solution. Building codes don’t mandate window seal replacement on the same schedule everywhere, but most jurisdictions expect homeowners to maintain windows to prevent water intrusion and air leaks.
Signs Your Window Seals Need Attention
Visible Damage and Weathering
Look at the frame edges where caulk meets the glass and siding. Cracks, gaps, or areas where the caulk has pulled away are red flags. Peeling paint on the window frame often hides moisture damage underneath, a sign water has been getting past the seal. Check the glazing compound on older wood windows: it should be smooth and pliable, not crumbly or missing. Discoloration or mold growth around the frame edges indicates moisture is being trapped.
Also inspect weatherstripping around the sash (the movable part of the window). If it’s compressed, cracked, or no longer springs back when you press it, it’s not sealing properly. On some windows, you’ll see foam tape or rubber gaskets that have deteriorated or shrunk away from the frame.
Performance Issues That Signal Failure
Drafts are the most obvious clue. Light a lighter or incense stick near the frame on a breezy day: if the flame or smoke moves, air is leaking. You might also feel cold air without visible draft, seals aren’t always a complete failure, just degraded.
Condensation between the panes (not on the outside surface) means the seal around the perimeter has failed. Once inside, moisture can’t escape, so it sits there, fogs the view, and reduces clarity. Some windows develop a white haze or mineral buildup for the same reason.
Increased heating or cooling costs aren’t easy to pinpoint on their own, but if your energy bill has crept up and your windows feel drafty, seal failure is a likely culprit. A room that’s hard to heat or cool near windows is another sign.
Tools and Materials You’ll Need
Materials:
• Caulk (acrylic latex or silicone: silicone lasts longer, ~20 years vs. 10 for acrylic)
• Glazing compound (for wood window frames: comes in cartridges or cans)
• Weatherstripping tape (self-adhesive foam or rubber, sized to fit your frame)
• Primer (if repainting: required for bare wood)
• Paint (exterior grade, matching existing trim)
Tools:
• Caulk gun (basic barrel type is sufficient)
• Putty knife (2–4 inches: flexible blade works better than stiff)
• Utility knife (to scrape out old caulk and compound)
• Scraper or old chisel (flat tip for removal)
• Ladder or step stool (for upper windows)
• Drop cloth (to protect siding and landscaping)
• Wet cloth or sponge (for cleanup before caulk dries)
Safety Gear:
• Safety glasses (glass shards, scraping debris)
• Gloves (latex or nitrile protect against wet caulk and cleaners)
• Dust mask (when scraping old, potentially crumbly compound)
If you’re removing weatherstripping, a heat gun can help soften adhesive, though a plastic scraper alone often works. For older windows with thick, stubborn glazing compound, patience and a heat gun make the job much easier, don’t force it or you risk breaking the glass.
Step-by-Step Window Seal Replacement Process
1. Assess and Plan
Decide whether you’re resealing the frame edges, replacing weatherstripping, or both. Inspect each window carefully. If condensation is trapped inside the glass unit, that sash unit needs professional replacement, don’t waste time caulking around it.
2. Remove Old Caulk and Weatherstripping
Use a utility knife or caulk removal tool to cut along the old caulk. Peel it away with a putty knife. For stubborn material, spray a small amount of caulk remover (available at hardware stores) and let it sit 15–30 minutes. Soften glazing compound on wood frames with a heat gun (set to medium: don’t char the wood), then scrape it out. Remove old weatherstripping by pulling it firmly: most self-adhesive tape will come off cleanly, but residual adhesive can be wiped away with rubbing alcohol and a cloth.
3. Clean the Frame Thoroughly
Wipe down the frame with a damp cloth to remove dust and debris. Let it dry completely. For wood frames, make sure there’s no mold or rot, if you find soft, dark wood, that area needs to be treated or replaced before resealing. Bare wood should be primed before caulking.
4. Apply New Weatherstripping
Measure the gaps between the sash and frame. Self-adhesive foam tape comes in various thicknesses: choose one that fills the gap without being compressed too much when the window closes. Peel the backing and press it firmly in place along all sides. Make sure corners are sealed and there are no gaps or folds.
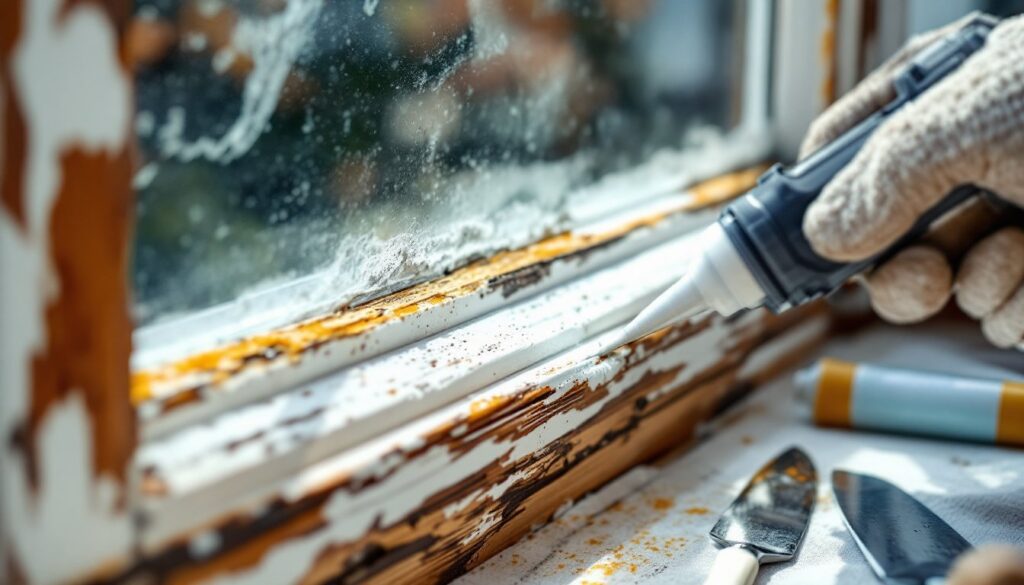
5. Caulk the Frame Edges
Load your caulk gun and cut the tip at a 45-degree angle. Start at one corner and run a bead along the joint where the frame meets the siding and where the glass meets the frame. Maintain steady pressure and move smoothly. The bead should be about 1/4-inch wide and completely fill the gap. Wet your finger (or use a caulk tool) and smooth the bead immediately, pushing it into the gap and removing excess. This step keeps caulk from drying lumpy or cracked.
6. Apply Glazing Compound (Wood Windows)
If your window has wood frames with glazing, use a putty knife to pack new compound into the space between the glass and frame rabbet (the recess). Work it in firmly, then smooth the surface at a 45-degree angle. Compound shrinks slightly as it cures, so overfill slightly. Let it dry per manufacturer instructions (usually 7–14 days for oil-based compound), then prime and paint.
7. Seal Any Gaps in the Frame Itself
If the frame edge shows gaps where it meets the siding, caulk those too. This prevents water from running behind the frame and causing rot.
8. Clean Up and Paint
Wipe excess caulk with a damp cloth before it cures. Once dry, paint over caulked areas if needed. Acrylic caulk accepts paint: silicone doesn’t, so if you use silicone, choose a color that matches your trim.
The entire job on one or two windows typically takes 1–2 hours. Let caulk cure fully (check the tube: most take 24 hours) before exposing windows to heavy rain or opening and closing them repeatedly.
Common Mistakes to Avoid During Replacement
Skipping prep work. Don’t try to caulk over old, failing caulk. It won’t bond and will fail again quickly. Remove all old material completely.
Not letting surfaces dry. Moisture trapped under new caulk causes it to fail. Clean the frame and wait for it to dry fully, at least 30 minutes on a dry day.
Using the wrong caulk. For exterior window frames, use exterior-grade caulk rated for wood and masonry. Interior-only caulk will degrade when exposed to UV and weather. Silicone caulk is more durable than acrylic latex but can’t be painted: choose based on your finish preference. Some contractors use specialized window sealants designed for this exact purpose.
Applying caulk in cold or wet weather. Most caulk needs temperatures above 50°F and dry conditions to cure properly. Check the label: applying during rain or frost means failure.
Forgetting the second pair of hands. While you can do this solo, having someone steady a ladder or hold the window open makes it safer and faster. For upper-story windows, always use a stable ladder and a spotter.
Ignoring structural damage. If the frame is rotted, warped, or the sash is broken, resealing won’t fix the core problem. Address those issues first, or accept that the repair is temporary. In some cases, professional window replacement services are the better long-term choice.
Overfilling the caulk bead. Too much caulk looks sloppy, takes longer to dry, and can trap moisture. A 1/4-inch bead is the standard: bigger gaps may need backer rod (foam rope inserted first to support the caulk) to keep from using excessive amounts.
Not testing the seal. After caulk cures, run your hand along the frame on a breezy day to feel for drafts. If you still feel air, you may have missed a gap or the seal wasn’t complete.
Many homeowners find that following step-by-step window guidance helps catch these errors before they matter. Take your time, read the material directions twice, and don’t rush the curing stage, that’s when most failures happen.