Table of Contents
ToggleA cracked or kinked Shark vacuum hose kills suction faster than a clogged filter, and it’s one of the most straightforward replacements you can tackle yourself. Whether your hose is worn, punctured, or just no longer drawing air properly, swapping it out takes 15 minutes and costs far less than a service call. This guide walks you through identifying your specific model, gathering the right parts, and completing the replacement without any surprises.
Key Takeaways
- A Shark vacuum hose replacement takes just 15 minutes and costs between $20–$50, making it one of the most cost-effective and straightforward maintenance tasks you can do yourself.
- Identify your exact Shark vacuum model number (usually starting with NV or UV) and check your hose connection type before ordering a replacement to ensure you get the correct part.
- Most Shark uprights use quick-connect clips or push-button releases that require gentle twisting and pulling—avoid forcing the hose to prevent cracking the connector port.
- Store your new hose loosely coiled to avoid stress cracks, keep it away from direct sunlight and heat above 120°F, and inspect monthly for blockages or kinks by holding it up to light.
- If your vacuum loses suction, check the hose first for cracks or blockages before replacing filters, as even hairline cracks force the motor to work harder and reduce cleaning power.
Why You Need To Replace Your Shark Vacuum Hose
A compromised hose is one of the most common reasons a vacuum loses suction or stops working altogether. Even hairline cracks let air escape, forcing the motor to work harder and reducing cleaning power. Kinks or blockages that you can’t clear out also warrant replacement rather than endless troubleshooting.
The hose takes a beating during regular use: it gets twisted around furniture legs, pinched in closets, and dragged across stairs. Over time, the plastic becomes brittle, especially in older models exposed to sunlight or heat. A failing hose can also create odd rattling sounds or weak suction patterns that feel inconsistent across the floor.
Replacing the hose yourself saves money and gets your Shark back to peak performance without waiting for a technician. Most aftermarket hoses cost between $20 and $50, depending on your model and whether you choose OEM (original equipment manufacturer) or third-party parts.
Identifying Your Shark Vacuum Model And Hose Type
Before ordering a replacement, you need to know your exact Shark model number. Look at the bottom or side of your vacuum, there’s a label with a model number (usually starting with “NV” or “UV” for Shark uprights and canisters). Write this down or snap a photo with your phone.
Next, examine the current hose connection points. Most Shark uprights use a quick-connect hose assembly that clips or slides into the main body near the dust cup. Canister models have different attachment styles, some use a threaded collar, others use a simple push-fit connector. The connection type determines which replacement hose you need to order.
You can find the exact replacement part number by searching your model on the Shark website or checking the user manual (often available as a PDF download). Cross-reference with reputable retailers like Amazon or the manufacturer’s parts store to confirm the hose diameter and length match your current setup. Having the right part on hand before you start prevents the frustration of ordering the wrong one twice.
Tools And Materials You’ll Need
This is a no-fuss job that requires almost nothing beyond the replacement hose itself.
Materials:
• Replacement hose (OEM or third-party, confirmed for your model)
• Optional: small container of silicone-based lubricant (for stubborn connection points)
Tools:
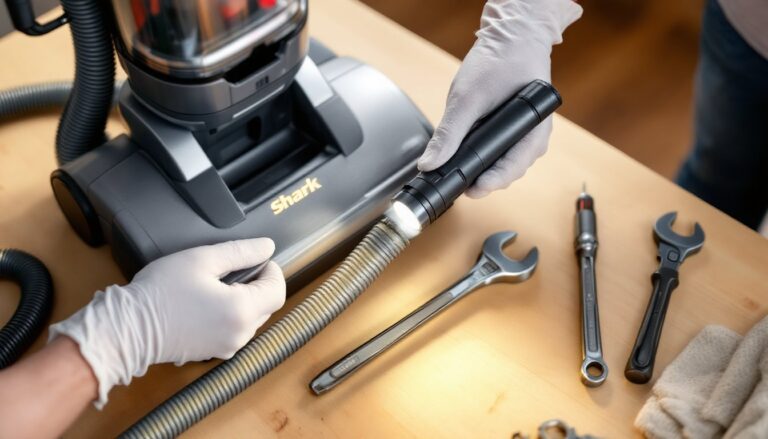
• Flashlight (to see connection points inside the vacuum)
• Flathead screwdriver (for prying clips on some models)
• Adjustable wrench (only if your model uses a threaded collar)
• Dry cloth or rag
Optional but handy:
• Work gloves (hoses can be dusty inside)
• Wet/dry shop vacuum (to clear loose debris from the connection ports before reassembly)
Unlike projects requiring power tools or specialized plumbing equipment, hose replacement is genuinely simple. Clear a workspace on a table or countertop, lay out your new hose and old one side-by-side, and take a quick photo of the current connections so you remember how everything attaches. This five-second step prevents fumbling when reconnecting.
Step-By-Step Replacement Instructions
Disconnect And Remove The Old Hose
1. Unplug the vacuum. This is non-negotiable, never work on electrical appliances while they’re powered. Set the vacuum on a flat surface and locate the hose connection at the main unit.
2. Release the hose from the dust cup or handle connection. Most Shark uprights use a locking clip or push-button release on either side of the connection point. Press or slide these clips inward to loosen the grip, then gently twist and pull the hose away from the vacuum body. If it’s stuck, use a flathead screwdriver to gently pry the clip tabs outward. Forced yanking can crack the connector port, so work slowly.
3. Check the secondary connection at the top brush roll housing. Some models require you to disconnect the hose from a second point near the cleaner head or hose handle. Repeat the release process, clip, twist, pull. If your model uses a threaded collar instead of a clip, hold the hose steady and turn the collar counterclockwise with an adjustable wrench.
4. Clear loose debris. Before installing the new hose, wipe out the connection ports inside the vacuum with a dry cloth. Dust or hair caught in these ports can prevent a snug fit and compromise the seal. A shop vacuum makes quick work of this, but cloth alone is fine.
Install The New Hose
5. Align the new hose with the connection port. Lay the new hose straight on a table first to check for any manufacturing burrs or rough edges. If the hose is slightly kinked from packaging, let it sit in the sun for a few minutes, warmth helps plastic relax. Do not force-straighten it by hand, as this can cause micro-tears.
6. Push the hose firmly onto the connection point until you hear or feel a click. For clip-style connections, slide the hose onto the port, then press the clips back into the locked position on both sides. You should hear a distinct snap. For threaded connections, push the hose in and turn the collar clockwise by hand until snug, then tighten with your wrench a quarter-turn. Over-tightening can strip the threads, so stop as soon as you feel firm resistance.
7. Reconnect the secondary attachment if your model requires it. If there’s a second connection point, repeat step 6 for that port. Ensure both connections are seated fully and locked in place.
8. Power on and test. Plug in the vacuum, place your hand near the end of the hose to feel for suction, and listen for any unusual sounds. The machine should feel noticeably more powerful than before if the old hose was compromised. Run a test pass over a small carpet area, the brush roll should spin freely and the motor should hum smoothly without strain.
Tips For Maintaining Your New Shark Vacuum Hose
Now that you’ve replaced the hose, a few simple habits keep it in good condition for years.
Check monthly for kinks and blockages. Hold the hose up to a light and look through it, you should see clear daylight on the other side. Any obstruction (pet hair, debris) should be cleared immediately. Use a straightened coat hanger or plumbing snake to dislodge stubborn blockages rather than forcing suction through them.
Avoid sharp bends and coiling the hose tightly. Store it loosely coiled in a bin or hung on a wall hook. According to home improvement repair guides, repeated stress on the same section of hose accelerates cracking. Rotate how you coil it occasionally to distribute wear.
Inspect the connection ports quarterly. Dust and hair accumulate around the clips and seals. A quick wipe with a dry cloth prevents debris from compromising the airtight fit. If you notice the hose feels loose after months of use, remove it and re-seat the connection firmly, sometimes repeated vibration causes clips to relax slightly.
Keep the hose away from direct sunlight and heat sources. Plastic becomes brittle when exposed to UV rays or temperatures above 120°F for extended periods. Don’t store your vacuum next to a furnace vent or in a south-facing garage. Cool, dry storage extends hose life noticeably.
If you notice slow suction returning, check the hose first before replacing filters or other parts. Many homeowners chase phantom clogs when a hairline crack in the hose is the real culprit. A quick visual inspection and blockage test take 30 seconds and save a lot of frustration.