Table of Contents
ToggleA shiplap kitchen island has become one of the most popular home improvement projects for DIY enthusiasts and homeowners looking to refresh their cooking spaces. Whether you’re drawn to the clean, modern lines or the farmhouse charm that shiplap brings, this trending element combines visual appeal with functional design. Installing a shiplap kitchen island doesn’t require a contractor’s budget or years of experience, with the right materials, tools, and patience, you can tackle this project yourself and create a stunning focal point that elevates your entire kitchen. Let’s walk through what makes a shiplap island special, why homeowners are choosing this style, and how to install and maintain one properly.
Key Takeaways
- A shiplap kitchen island combines distinctive overlapping wooden planks with functional island design, offering a trendy way to refresh your kitchen without a full remodel.
- Shiplap islands work across multiple design styles—from farmhouse to modern—with color and orientation options (vertical, horizontal, or diagonal) allowing customization to any aesthetic.
- Installing a shiplap kitchen island is a manageable DIY project over one to two days when you properly measure, acclimate boards, use the right fasteners, and follow a step-by-step approach.
- Proper finishing with primer and paint or stain is critical for durability and low maintenance; well-finished shiplap resists moisture, requires only occasional touch-ups, and lasts decades.
- Budget-friendly material selection and careful attention to edge transitions and board spacing ensure a professional-looking result that elevates your entire kitchen.
What Is a Shiplap Kitchen Island?
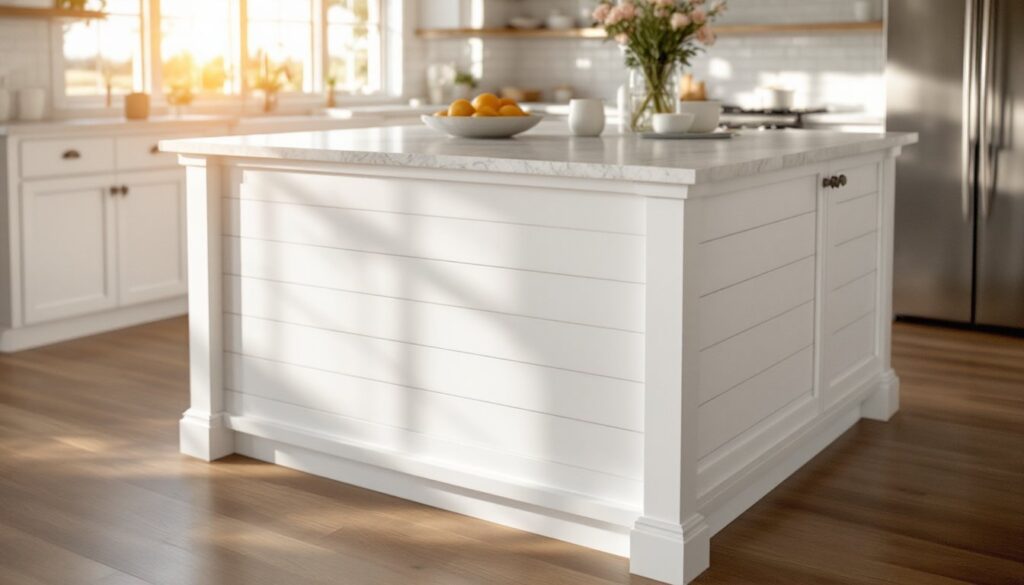
Shiplap is a type of wooden board with a rabbet joint cut along the long edges, which allows planks to overlap and fit together tightly. When applied to a kitchen island, shiplap creates a smooth, continuous surface that looks like overlapping wooden planks. The boards are typically 1 inch thick and range from 4 to 10 inches wide, though some decorative shiplap uses thinner material (1/2 inch) for a lighter aesthetic.
A shiplap kitchen island combines this distinctive wall finish with a functional island base. The shiplap covers the exterior sides and sometimes the front of the island, while the interior houses cabinetry, shelving, or open storage underneath. Homeowners use shiplap to create visual interest and define the island as a design statement rather than just another appliance.
Shiplap differs from regular beadboard or tongue-and-groove planking in its joinery, the overlapping rabbet joint creates a tighter seal and more refined appearance. When painted white, gray, or stained in natural wood tones, shiplap instantly adds character without requiring extensive construction skills to install.
Why Shiplap Kitchen Islands Are Trending
Shiplap kitchen islands have surged in popularity because they bridge the gap between cosmetic updates and substantial design impact. Unlike a full kitchen remodel, adding shiplap to an existing island (or building one with shiplap cladding) is an affordable way to refresh the heart of your kitchen without months of construction or five-figure invoices.
The style works across multiple design aesthetics, farmhouse, coastal, modern, transitional, and even minimalist kitchens can incorporate shiplap. Its versatility lies in finish options: crisp white for farmhouse appeal, soft grays for contemporary spaces, or natural wood tones for rustic warmth. A vertical shiplap kitchen island, in particular, creates strong visual lines that draw the eye and make smaller kitchens feel taller and more spacious.
Practically speaking, shiplap is durable, easy to clean, and resists moisture better than drywall when properly sealed. Homeowners appreciate that it hides imperfections on the island base and provides a finished look that appears intentional and elevated.
Design Styles and Aesthetic Options
Vertical shiplap creates a sleek, modern look with strong upward lines that complement contemporary kitchens and open floor plans. Horizontal shiplap, the traditional orientation, works beautifully in farmhouse and cottage-style homes. For a hybrid approach, some design enthusiasts use diagonal shiplap for unexpected visual interest, though this requires more cutting and planning.
Color choices define the final aesthetic. 20 shiplap kitchen designs, proving that shiplap adapts to any palette. Stained natural wood shiplap works well in kitchens with warm wood cabinetry, while painted finishes pair beautifully with mixed-material countertops and hardware.
Budget-Friendly Installation Guide
Installing shiplap on a kitchen island is a manageable DIY project if you approach it methodically. Most homeowners complete the job over a weekend, though some prefer breaking it into two days to allow paint or stain to cure between steps.
Before you begin, measure the island’s exterior dimensions carefully. Measure height, width, and depth of each side you plan to cover. Determine whether you want shiplap on all four sides or just the two visible sides (if the island backs against a wall). Factor in overhang and how shiplap will meet the countertop edge, a neat transition with trim is essential for a professional finish.
Materials and Tools You’ll Need
Materials:
- Shiplap boards (1 inch thick, 6–8 inches wide is standard: calculate linear footage based on your island dimensions)
- Pneumatic brad nails (1.25–1.5 inches) and a brad nail gun, or stainless steel trim-head screws (2 inches) if you prefer mechanical fastening
- Wood filler to match your board species
- Primer and paint (if painting) or wood stain and finish (if staining)
- Trim pieces for edges and transitions (optional but recommended)
- Wood glue (for added holding power if using nails alone)
Tools:
- Miter saw or circular saw for crosscutting boards
- Power drill with driver bit
- Pneumatic brad nail gun or manual nailer
- Measuring tape and level
- Pencil or marking knife
- Orbital sander (helpful for prepping boards: 120–150 grit)
- Paintbrush or foam roller for primer and topcoat
- Safety glasses, dust mask, and ear protection
Step-by-step installation:
-
Prep the island surface. Remove any existing finish, loose material, or hardware from the sides. Sand the face lightly with 150-grit sandpaper to help adhesion. Ensure the surface is clean and dust-free.
-
Acclimate the boards. If you’ve stored shiplap in a dry garage, let it sit in your kitchen for 48 hours before installation so moisture content matches the room. Uneven acclimation leads to gaps and warping later.
-
Start at the bottom. Use a level to find the lowest point where you’ll place the first board. Snap a chalk line to guide the bottom edge. Begin with a full-width board (not cut) for strength.
-
Apply adhesive and fasteners. Run a thin bead of wood glue along the back of each board. Drive brad nails or trim-head screws every 16–24 inches (roughly stud spacing if there’s a frame underneath). Two fasteners per board is standard: three for longer boards.
-
Work upward. Each successive board overlaps slightly into the rabbet joint of the one below. Maintain consistent spacing by test-fitting boards as you go. A slight gap between boards (1/8 inch) allows for seasonal wood movement.
-
Cut boards as needed. Use a miter saw for angle cuts at corners, a circular saw for lengthwise rips, and a jigsaw for around outlets or appliances (though kitchen islands rarely have these). Smooth cut edges with 150-grit sandpaper.
-
Finish the edges. Where shiplap meets the countertop, install a trim piece or edge band to create a clean transition. Corners can be finished with simple mitered trim or left with a simple butt joint, depending on your design preference.
-
Prime and paint or stain. Two coats of primer followed by two coats of paint ensures durability and hides grain if you’re going white. If staining, apply wood conditioner first (on softwoods like pine) so stain color is even. Let the finish cure for 24–48 hours before heavy use.
Pro tips: Invest in a quality miter saw if you don’t own one, it makes crosscutting shiplap fast and accurate. Pre-drill screw holes to prevent splitting, especially near board ends. Don’t rush the finishing step: a properly primed and painted shiplap island will last decades with minimal maintenance.
Maintenance and Durability Tips
A well-finished shiplap kitchen island is remarkably low-maintenance compared to bare wood or drywall. The key to longevity is the finish, primer and paint (or stain and sealant) protect the wood from moisture, spills, and daily wear.
Wipe spills immediately with a damp cloth to prevent water damage. Avoid leaving standing moisture near the base where humidity or dishwasher steam can seep in. For heavy-duty cleaning, use a soft sponge and mild dish soap: avoid abrasive scrubbers that can scratch paint.
High-traffic kitchens may see minor chipping or scuff marks on shiplap within a few years. These are easy to touch up with leftover paint and a small brush. 10 easy pieces featuring seasonally or as needed.
If you notice gaps forming between boards (especially in dry climates or older homes with settling), this is normal seasonal movement. Large gaps can sometimes be filled with paintable caulk, but minor gaps are acceptable and expected. Repaint the island every 5–10 years, depending on kitchen humidity and sunlight exposure, to maintain color vibrancy and protective coatings.
Conclusion
A shiplap kitchen island transforms your cooking space with minimal structural work and maximum visual impact. Whether you choose vertical shiplap for modern lines or classic horizontal boards for farmhouse charm, the project remains achievable for homeowners with basic tool experience. Careful measurement, proper material acclimation, and attention to finishing will yield an island that looks professionally installed and serves your kitchen beautifully for years to come.