Table of Contents
ToggleA table saw is one of the most powerful tools in any home workshop, but it comes with a hidden limitation: rip cuts longer than your saw’s depth create safety and accuracy nightmares. Without an outfeed table for your table saw, you’re fighting gravity and loss of control on long stock. A properly built outfeed table extends your cutting surface, supports heavy material, and prevents your workpiece from tipping or binding mid-cut. Whether you’re tackling cabinet-making or rough lumber work, this DIY solution pays for itself in safety and cleaner, straighter cuts.
Key Takeaways
- An outfeed table for your table saw is essential for safe, accurate long rips by supporting heavy material and preventing gravity-driven binding or kickback.
- Build your outfeed table with a 2×4 frame and 3/4-inch plywood deck using pocket holes, costing $150–$300 and matching your saw’s height within 1/16 to 1/8 inch for smooth material feeding.
- Seal your plywood deck with two coats of polyurethane and use a straightedge to verify coplanarity with the saw table before final assembly to prevent tapered cuts.
- Add customization features like flip-up stop blocks, locking casters for storage, or dust collection ports to maximize workshop efficiency and safety.
- Choose pocket-hole screws over nails, hardwood veneer plywood for durability, and consider upgrading to melamine or Masonite surfaces for high-traffic shops where cost-effectiveness meets longevity.
Why Your Table Saw Needs an Outfeed Table
Most table saw accidents happen because material drops or kicks back when it loses support past the blade. Long rips on stock over 4 feet expose your hands and forearms to the spinning blade, and your workpiece won’t feed straight without rear support. An outfeed table acts as a safety net, literally, by catching the workpiece as it exits the blade and preventing gravity-driven binding.
Accuracy matters too. A properly aligned outfeed table keeps your material flat and coplanar with your saw’s table, ensuring consistent depth of cut across the full length. Without it, stock tilts slightly after the blade, creating taper and frustration. Industrial table saws include built-in outfeed support: a DIY outfeed table brings that precision to your shop.
Essential Materials and Tools You’ll Need
Before you build, inventory your materials and tools. A typical outfeed table runs 4 feet long and 18–24 inches deep, sized to match your saw’s rip capacity. You’ll need lumber for the frame, plywood for the working surface, fasteners, and finishing supplies.
A basic setup costs $150–$300 depending on lumber grade and whether you upgrade the working surface. Pressure-treated lumber is cheaper but leaves surface splinters: cabinet-grade pine or poplar costs more but planes and sands cleanly. Plywood comes in standard 3/4-inch thickness for the deck, thinner material will sag under workpiece weight.
Lumber and Hardware Selection
Frame the outfeed table with 2×4 studs (nominal dimensions: actual size is 1.5″×3.5″) set 16 inches on-center. For a 4-foot by 2-foot table, you’ll need four legs, four long rails, four short rails, and cross-bracing to prevent racking. Legs should be 34–36 inches tall to position the deck even with or slightly above your table saw’s surface. Buy legs pre-drilled to your saw’s height if you own a specific model, or measure and adjust after assembly.
The working surface is 3/4-inch plywood, typically birch or pine veneer. Hardwood veneer sands smooth and resists blade marks better than softwood. Seal it with two coats of polyurethane once installed, this reduces friction and lets material glide without sticking.
Fasteners matter. Use 2.5-inch exterior wood screws (not nails: they won’t hold under vibration) to lag the frame together, and 1.25-inch pocket-hole screws or finish screws to attach the plywood deck. Pocket holes hide fasteners and distribute load better than surface screws. If you don’t own a pocket-hole jig, borrow or rent one: the $40 rental pays back fast on multiple projects.
Include a straightedge tool or 4-foot level to check that the deck is perfectly coplanar with your saw table before final fastening. Even 1/8 inch of lift or sag ruins alignment.
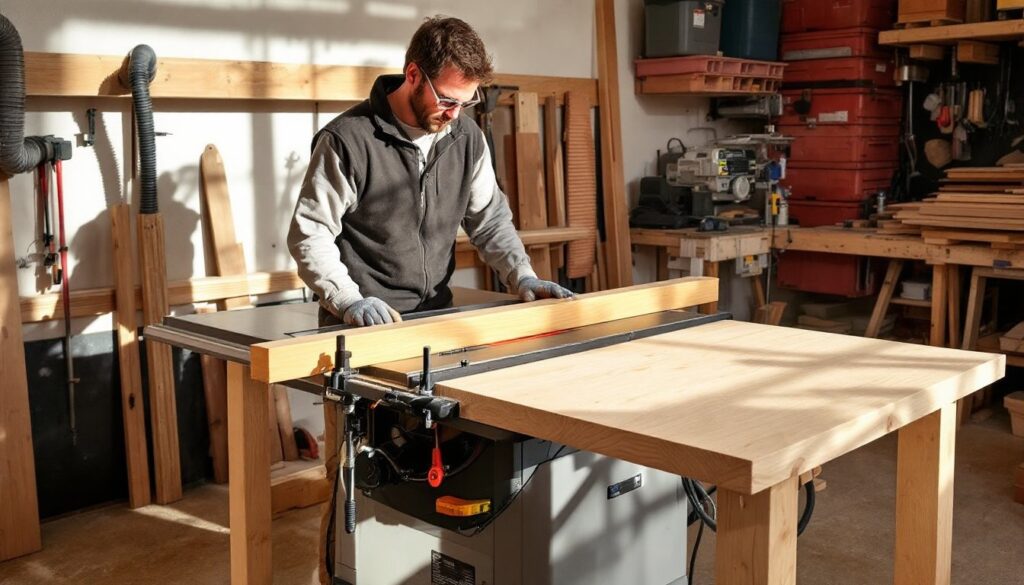
Step-by-Step Building Instructions
Build the frame first, test the fit to your saw, and install the deck last. This modular approach lets you adjust height and position before committing fasteners.
Frame Construction and Assembly
Cut all frame lumber to length before assembly. Lay out two long rails (the sides running front-to-back) on sawhorses, then position four legs at 16-inch intervals. Drill pocket holes on the underside of the rails where legs meet, two holes per joint provides enough shear strength. Screw the legs in, then flip the frame and attach the four short rails (front-to-back cross-members) using the same pocket-hole method.
Test the frame for square by measuring diagonal corners: they should match within 1/4 inch. Nail or screw a diagonal cross-brace (a 2×4 set corner-to-corner on the underside) to lock the frame rigid. This brace prevents racking when you’re feeding heavy stock through the saw.
Place the frame behind your table saw and check height. The top of the frame should sit 1/16 to 1/8 inch below your saw table surface, this allows material to roll onto the outfeed table smoothly without binding on the edge. Shim legs with plastic wedges or adjustable feet if needed. Once height is locked in, secure legs to the floor with brackets or weights to prevent creep during use.
Surface Installation and Alignment
Measure and cut your plywood deck to overhang the frame by 1 inch on all sides. This overhang lets you clamp stop blocks without snagging the frame edge. Sand the plywood with 120-grit paper first, then 150-grit for a smooth finish. Round the leading edge slightly with a block plane or 1/8-inch roundover bit to prevent splinters.
Apply two coats of polyurethane (satin finish reduces glare) and let it cure fully before mounting. This seal protects against moisture and blade dust settling into the wood grain.
Position the plywood deck on the frame and check coplanarity using a straightedge across the saw table and outfeed deck. The gap should be zero: if not, shim under the frame corners until it’s perfect. Once aligned, drive 1.5-inch pocket-hole screws every 6 inches around the perimeter and every 12 inches in the field to lock the deck down. Pocket holes hide fasteners and prevent the deck from cupping over time.
After installation, run a test piece through the saw to confirm smooth feeding. The workpiece should roll off the saw table onto the outfeed deck without catching. If it does, suspect a height mismatch, recheck with your straightedge and adjust shims as needed.
Customization and Storage Options
Once your outfeed table for table saw is dialed in, you can add features that make your shop flow better. Many woodworkers attach a flip-up stop block to the rear rail, held by a piano hinge and latch. This lets you repeat crosscuts or rip lengths without moving a fence. Others glue a sandpaper strip (60-grit adhesive-backed) to the deck near the blade to create friction and prevent small offcuts from sliding across the table.
If workshop space is tight, build the outfeed table on locking casters. Full-height casters let you roll the table aside when the saw isn’t in use, reclaiming floor area. Keep caster locks engaged during operation, vibration from the saw can inch a wheeled table out of position. Choose casters rated for at least 300 pounds static load: underthinking this detail invites a collapse when your table is buried under plywood.
Storage under the deck is prime real estate. Add a simple plywood shelf 18 inches below the deck to stash sheet goods, ripped stock, or off-cuts. Include a small dust collection port (4-inch PVC) on one leg, tied to your shop vacuum. Dust settles on the deck faster than you’d expect: a quick vacuum before each job keeps the surface clean and gliding smoothly.
For advanced setups, consider adding a power feed system or adjustable roller stands if you work with heavy stock regularly. Instructables and Family Handyman host detailed plans for motorized outfeed tables if you want to scale up. Similarly, some shops surface the deck with Masonite or melamine instead of plywood, both materials are slicker and easier to replace when they wear out. Melamine costs a bit more but lasts nearly twice as long under constant friction.