Table of Contents
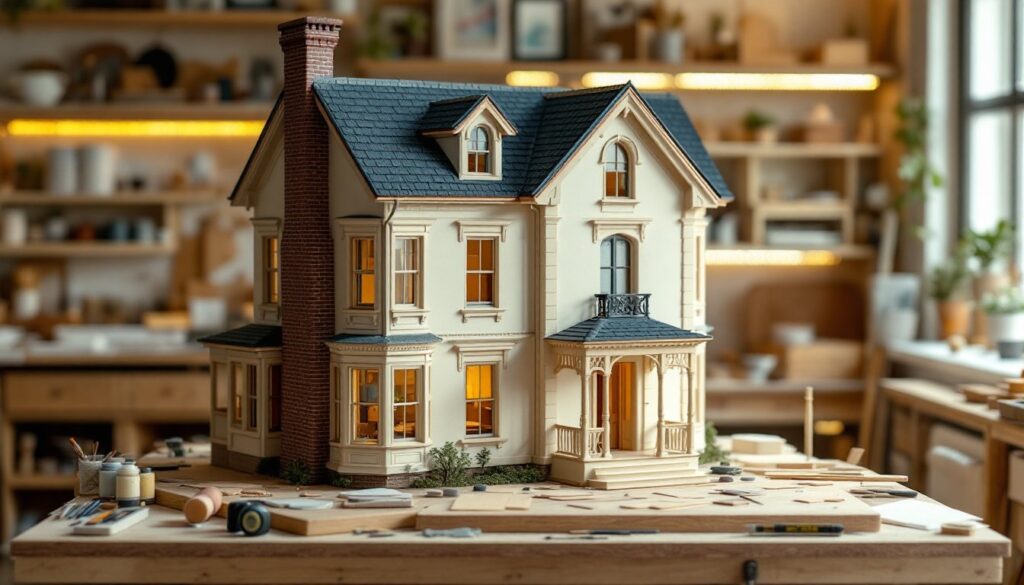
ToggleDollhouses aren’t just for kids anymore, they’ve become a rewarding DIY project for adults who enjoy detailed craftsmanship and creative problem-solving. A tiny dollhouse combines woodworking fundamentals, finishing skills, and imaginative design into a tangible creation you can display with pride. Whether you’re a seasoned woodworker or a curious beginner, building a miniature home teaches patience, precision, and the satisfaction of creating something charming from raw materials. This guide walks you through the entire process, from material selection to final touches, so you can build a tiny dollhouse that reflects your personal style.
Key Takeaways
- Building a tiny dollhouse is a rewarding DIY project for adults that teaches woodworking, precision, and creativity while remaining manageable in scope and cost.
- The most common mistakes include skipping surface prep, poor measurement and planning, overcomplicating your first build, and using mismatched scale furniture that diminishes the final appearance.
- Start with a simple single-room or two-room cottage design in 1:12 scale before attempting complex multi-story builds, ensuring you use proper materials like 1/4-inch plywood, softwood lumber, and quality finishing supplies.
- A tiny dollhouse benefits from thoughtful design choices like selecting a cohesive architectural style, adding LED lighting for realism, and incorporating landscape details that transform it into a complete, professional-looking diorama.
- Success requires investing time in sanding between primer and paint coats, measuring twice before assembly, and allowing full drying time between steps—shortcuts during construction compound into costly mistakes during finishing.
What Makes Tiny Dollhouses So Popular
Tiny dollhouses appeal to hobbyists for several practical and emotional reasons. First, they’re manageable in scope, a complete project that doesn’t consume a garage for months or require major tool investments. Second, the creative control is absolute: you choose the architectural style, color palette, furnishings, and level of detail. Unlike full-scale home renovation, there’s minimal risk of costly mistakes, and imperfections often add character rather than create headaches.
They also serve multiple purposes. Some builders create detailed roombox displays, others craft functional storage that doubles as decor, and enthusiasts build entire neighborhoods of connected tiny homes. The miniature crafting community is thriving online, with countless resources, inspiration galleries, and fellow hobbyists sharing techniques. For those interested in detailed crafting work, building a tiny dollhouse is an ideal entry point, it teaches woodworking, painting, and design principles at a forgiving scale.
Essential Materials and Tools You’ll Need
Materials
- 1/4-inch plywood sheets (also called “luan” or “underlayment”, use quality-grade, not sanded varieties prone to voids)
- 1×4 and 1×2 lumber in pine, poplar, or similar softwood (nominal sizes: actual dimensions run 3/4″ × 3.5″ and 3/4″ × 1.5″)
- Wood glue (standard yellow aliphatic type works well)
- Finishing nails (1.5-inch and 0.75-inch)
- Sandpaper (120-, 150-, and 220-grit for progressive smoothing)
- Primer and paint (acrylic or latex, suitable for miniature work)
- Stain (optional: depends on your design)
- Decorative hardware (hinges, knobs, brackets if adding removable walls or doors)
Tools
- Circular saw or miter saw (miter saw gives cleaner crosscuts and angled joints)
- Drill with bits (for pilot holes to prevent splitting softwood)
- Hand tools: tape measure, try square, pencil, coping saw for curved cuts
- Finishing tools: paintbrushes (sizes 0, 2, and 4 for detail work), foam roller for large areas
- Safety equipment: safety goggles, dust mask, work gloves, hearing protection
You don’t need expensive machinery: basic hand tools paired with a miter saw or circular saw cover most cuts. Invest in a quality tape measure, accuracy at small scales matters.
Step-by-Step Construction Process
Building the Basic Structure
Start with a clear, scale-appropriate design. A common beginner scale is 1:12 (one foot on the dollhouse equals twelve feet full-size), though 1:6 and 1:24 scales are also popular. Sketch your floor plan and exterior elevation, even rough drawings prevent costly errors.
Begin by cutting your base from 1/4-inch plywood, typically 18–24 inches square. Cut the four exterior walls from 1×4 or 1×6 lumber to your planned height (12–18 inches is typical for a small cottage). Use a miter saw to cut the roof angles: a 45-degree miter creates a peaked roof. Assemble walls with wood glue and finishing nails, ensuring corners are square using a try square. Pre-drill nail holes with a 1/16-inch drill bit to prevent wood splitting.
Add 2×2-inch interior corner braces (made from ripped plywood or softwood) at each interior corner. This reinforces the structure and provides gluing surfaces for future partitions. Attach the roof pieces with glue and nails, ensuring overhang is even on all sides (typically 1–2 inches).
Attempt this stage dry, assemble without glue, check fit, measure diagonals (they should be equal if square), then apply glue and secure with nails. Rushing assembly creates twisted, misaligned structures that frustrate later finishing work.
Adding Interior Details and Finishing Touches
Once the shell is solid, add flooring and internal walls. Cut flooring from 1/8-inch-thick craft plywood or hardboard to fit snugly between walls: glue and nail it in place. Interior partitions are non-structural, so lighter material works, **1/8-inch plywood or **chipboard” suffices. Plan doorways and openings before installation.
For windows and doors, a handy shortcut is using pre-made miniature components available through craft suppliers, these save time and improve the finished appearance. Alternatively, create simple openings and frame them with 1/2-inch-wide trim strips (ripped from softwood or pre-made trim).
Finishing begins with sanding. Start with 120-grit sandpaper, progress to 150-grit, and finish with 220-grit for a smooth surface. Pay special attention to edges and visible glue lines. Dust thoroughly before priming.
Apply a primer coat (standard drywall primer works fine), sand lightly between coats, then add two finish paint coats. Use a small 2-inch foam roller for large walls and size 2 and 4 brushes for trim and detail work. Allow full cure time between coats, 24 hours is typical for latex paint. Paint from top down (roof first, then walls, then base) to avoid repainting drips.
For an aged or rustic look, apply stain to raw wood before primer, or add weathered effects after paint dries using dry-brush techniques with contrasting paint colors. Resources like Instructables and The Spruce Crafts offer excellent step-by-step tutorials on aging and finishing techniques.
Design and Decoration Ideas for Your Miniature Home
The design phase is where personality enters. Consider an architectural style first: Victorian cottage, modern farmhouse, coastal cabin, or mid-century ranch. Your chosen style guides color, materials, and decor selections.
Exterior finishes set the tone. Paint choices might include warm creams and soft grays for farmhouse, deeper colors (slate blue, forest green) for Victorian, or bright whites and pastels for coastal. Add texture with weathered shingles on the roof (craft paper, fine shingles purchased in bulk, or hand-cut shakes from wood strips). Chimneys from stacked wooden dowels or brick-pattern paper reinforce style authenticity.
Interior decoration relies on scale-appropriate furnishings. Sources include dollhouse specialty retailers, etsy merchants, and DIY makers. For budget-conscious builders, simple pieces can be crafted: beds from foam and fabric, tables from wood blocks and dowels, shelving from thin plywood strips. The key is cohesion, mismatched eras and scales create visual chaos.
Lighting elevates realism dramatically. Small LED puck lights (battery-operated, widely available online) fit inside rooms and suggest warmth. Wiring is simple, no electrical permit required for low-voltage battery systems. Placement behind furniture or above doorways creates cozy ambiance.
Landscaping and exterior details matter too. A small base platform extended beyond the house footprint allows for miniature gardens, fencing, or walkways. Gravel, moss, tiny shrubs, and paint-detailed pathways transform a structure into a complete diorama. Resources like Fix This Build That provide detailed project plans for landscaping and scenery.
Common Mistakes to Avoid
Skipping surface prep is the most common error. Visible glue joints, rough edges, and uneven sanding undermine even careful painting. Invest time sanding between primer and finish coats, it’s tedious but transforms the final result.
Poor measurement and planning leads to misaligned walls or gaps. Always measure twice, verify that assembled walls form right angles using a try square, and test-fit components before gluing. Mistakes at assembly stage compound during finishing.
Overcomplicating the first build frustrates many beginners. Start with a simple single-room or two-room cottage before attempting a multi-story mansion. Simpler projects teach fundamentals without overwhelming you.
Using wrong-scale furniture and decor creates a cluttered, unprofessional appearance. If building 1:12 scale, use 1:12 furnishings. Mixing scales looks amateurish even if the architecture is flawless.
Neglecting ventilation during finishing work risks health hazards. Use primer and paint in a well-ventilated space, wear a dust mask during sanding, and use goggles to protect eyes from fine particles. Paint fumes, while usually not toxic at hobby levels, are uncomfortable in enclosed spaces.
Working with wet paint or glue creates a mess. Allow adequate drying time, rushing between steps is penny-wise but pound-foolish. Set a schedule and stick to it.