Table of Contents
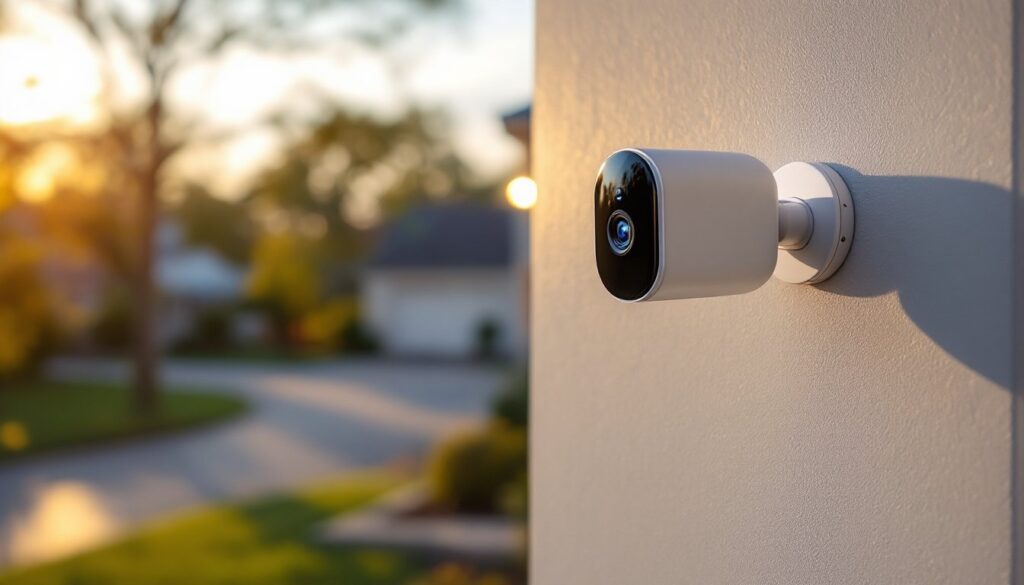
ToggleWireless security cameras have shifted from luxury to necessity for most homeowners. Whether you’re monitoring a front door, backyard, or garage, a wire-free camera system offers flexibility that traditional hardwired setups can’t match. No running cables through walls, no hiring an electrician, and no permanent installation, just mount, connect, and monitor from your phone. This guide walks you through what matters most when choosing a wireless security camera, from battery life and video quality to installation best practices that keep your system running reliably year-round.
Key Takeaways
- A wire-free security camera system eliminates costly professional installation and cable routing, allowing flexible placement based on activity zones rather than outlet locations.
- Battery life in wireless cameras typically ranges from 3–6 months under normal use, but cold weather can cut this by half—solar panels and seasonal charging schedules are essential in cold climates.
- Resolution matters less than placement: a well-positioned 1080p wire-free camera outperforms a poorly-placed 4K camera, so test your camera angle and Wi-Fi signal strength before permanent mounting.
- Mount cameras 8–10 feet high angled slightly downward to capture faces clearly, and position them to avoid direct sunlight and backlight that causes blown-out or glare-washed footage.
- Two-way audio, AI-powered motion detection, and overlapping camera coverage with minimal blind spots deliver the forensic-quality monitoring that defines modern home protection.
Why Wireless Security Cameras Are Changing Home Protection
Wireless security cameras eliminate one of the biggest pain points of traditional surveillance: installation. Without running cables to power outlets or internet hubs, homeowners gain control over placement. You can position a camera where it actually catches activity, not where an electrical outlet happens to exist. Battery-powered models also free you from the hassle of professional installation, which often costs hundreds of dollars and requires wall penetration and permit paperwork.
The appeal extends beyond convenience. Modern wire-free cameras now deliver the image quality and night vision that used to be exclusive to professional-grade systems. Many models include two-way audio, motion detection, and cloud or local storage options. Plus, if you move or renovate, your cameras come with you, no leftover wall damage or abandoned conduit to deal with.
That said, wireless doesn’t mean maintenance-free. Batteries drain, especially in cold weather or with frequent motion alerts. Connectivity depends on your Wi-Fi signal strength, and repairs sometimes require professional service. Understanding these trade-offs upfront helps you choose a system that matches your expectations and your property layout.
Key Features To Look For When Choosing A Wire-Free System
Not all wireless cameras perform equally. Before comparing price tags, focus on the features that directly affect how well your system protects your home.
Resolution and frame rate shape what you can actually see. A 1080p camera delivers clearer images than 720p, but a 2K (2560 × 1440) or 4K camera provides the detail needed to identify faces or license plates from a distance. Frame rate matters too: 30 fps (frames per second) is standard, but some models offer 60 fps for smoother video of moving subjects. Consider your priority, wide coverage or clear identification, and choose resolution accordingly.
Field of view (FOV) determines how much area one camera covers. A standard FOV is 110–120 degrees, while wider lenses reach 150–180 degrees. Wider isn’t always better: it can introduce distortion at the edges, and a narrower 80–100 degree lens sometimes catches critical detail more clearly. Map your property and think about where blind spots matter most.
Two-way audio and motion detection are table-stakes features now. Two-way audio lets you speak through the camera, which deters trespassers and lets you greet delivery drivers. Motion detection triggers recordings and app alerts, but false positives from wind-blown branches or passing cars will drain your patience (and your battery). Some cameras use AI-powered filters to distinguish humans from other movement, reducing alert fatigue.
Storage options vary widely. Cloud-based storage (via the manufacturer’s subscription) keeps footage accessible from anywhere but costs monthly fees. Local storage (microSD card or NAS drive) keeps footage private and offline but limits capacity. Some systems offer hybrid approaches, recording locally and uploading a cloud backup.
Power Options And Battery Life
Battery chemistry and capacity directly affect how long you’ll wait between charges. Lithium-ion batteries are standard now: they hold more charge than older NiMH batteries and perform better in cold weather. Most wireless cameras rate battery life at 3–6 months per charge under normal use, though this varies wildly depending on climate, motion frequency, and video quality settings.
Cold weather hammers batteries. Below 32°F, a battery rated for 6 months might last 2–3 months. If you live in a cold climate, account for this and plan charging schedules around seasonal shifts.
Solar charging panels extend battery life significantly. A 2–4 watt solar panel paired with a camera rated for 5–6 months of battery life can achieve near-continuous operation, assuming adequate sunlight. For shaded areas or northern climates with weak winter sun, solar is less effective, and you’ll still swap batteries seasonally.
Wired cameras (powered via outdoor-rated low-voltage cable running to an outlet or PoE injector) eliminate battery anxiety entirely, but they sacrifice the installation ease that makes wireless appealing in the first place. Some hybrid models use a rechargeable battery as backup, a solid middle ground if you have an outdoor outlet nearby.
Battery removal should be intuitive. Avoid cameras that require tools to access the battery: you’ll dread the charging ritual and skip it longer than you should. Cameras with quick-release battery doors encourage timely maintenance.
Video Quality And Night Vision
Daytime video quality depends on sensor size, lens quality, and processing power. A larger sensor (1/2-inch or bigger) captures more light and delivers cleaner images than 1/4-inch sensors common in budget models. But, optical image stabilization (OIS) matters more than sensor size if you’re mounting on a windy overhang or tree branch, it smooths vibration-induced blur.
Night vision typically uses infrared LEDs to illuminate subjects in total darkness. Some cameras also include a light ring or white-light LED, which produces natural-looking color footage at night but consumes more battery. Infrared alone is fine for motion detection and basic identification: white light is better if you want forensic-quality detail after dark.
Color night vision (often marketed as “starlight” or “low-light”) is real but resource-hungry. It requires a fast lens and aggressive sensor gain, which introduces noise. In pitch darkness, infrared still outperforms color night vision, but in twilight or streetlight conditions, color night vision can be superior. Check reviews of models you’re considering, not just spec sheets.
Video compression affects both storage needs and image quality. H.264 is the standard codec: H.265 (HEVC) compresses about twice as efficiently, cutting storage and bandwidth by half. Older devices might not support H.265 playback, so confirm compatibility with your phone and computer before choosing a camera.
Installation Tips For Maximum Coverage And Reliability
Mounting height and angle are critical. Cameras 8–10 feet high capture faces clearly (humans are roughly 5–6 feet tall, so aiming slightly downward frames heads in the frame). Too high, and you’re recording scalps: too low, and reflections off windshields or sun glare wash out the image. Test placement during the time of day when activity matters most, morning for front porches, dusk for driveways.
Wi-Fi signal strength determines reliability. Cameras dropped far from your router (beyond 30–40 feet of open space) may disconnect frequently, miss motion alerts, or struggle uploading footage. Before mounting permanently, walk the area with your phone and check Wi-Fi signal bars. If signal is weak, either move your router, add a mesh Wi-Fi node closer to the camera, or use a 5GHz band if the camera supports it (faster but shorter range). 2.4GHz penetrates walls better but is more congested.
Position cameras to avoid direct sunlight, especially backlit mounting. Bright sun behind the camera’s field of view causes blown-out footage and glare on the lens. If backlight is unavoidable, use a glare-reducing sun hood or adjust the camera angle slightly to minimize sun in the frame.
Weatherproofing matters, even for IP66-rated cameras (which resist dust and jets of water). Install a slight downward angle so rain sheds off rather than pooling on the lens dome. If rain is common in your region, add an eave or small overhang. Moisture inside the lens is a common failure mode, especially as temperatures fluctuate.
Mount securely. Use corrosion-resistant stainless steel fasteners (not zinc-plated), particularly in humid or coastal climates. Zinc-plated hardware rusts fast and stains the wall. If mounting to vinyl siding, use backing plates to distribute load and prevent sagging.
Consider a second camera for overlap. One camera usually misses the approach to your house or the corner of the yard. Strategic placement with overlapping coverage eliminates blind spots and captures subjects from multiple angles, invaluable for identifying details.
Recent expert reviews of wireless security cameras highlight placement as a top factor in system satisfaction. A camera positioned too high or too far from activity becomes a expensive blind spot, no matter how sharp the image quality. Test your placement before committing to permanent mounting.
For renters or those hesitant about drilling, adhesive mounts exist, but they’re weaker and less reliable in high winds or with heavier cameras. If you rent, confirm your lease allows security cameras: most do, but fastening methods vary. Adhesive mounts cause less wall damage and simplify removal, though they occasionally fail and drop the camera.
Wi-Fi password entry is often tedious on a camera’s setup app. Use a temporary SSID (network name) with a simple password during installation, then connect the camera before switching back to your main network security settings. This speeds up pairing and reduces setup frustration.
Test motion detection sensitivity after install. The default is usually too aggressive, triggering on wind and passing cars. Spend a day adjusting the threshold downward until you catch intended activity without alert spam. Early fine-tuning saves weeks of notification fatigue.
Independent testing from comprehensive wireless camera reviews shows that installation placement outweighs raw specs in real-world performance. A 1080p camera well-positioned beats a 4K camera with poor sightlines every time.
Conclusion
Wireless security cameras offer genuine convenience and flexibility that hardwired systems can’t match. The key is matching the camera’s features and power profile to your specific needs, not chasing specs you’ll never use. Focus on placement and Wi-Fi coverage first, then choose a camera built for your climate and power-management preferences. With honest installation and seasonal battery maintenance, a wireless camera system provides years of reliable home monitoring without the cost or hassle of professional installation.