Table of Contents
ToggleA dead Shark vacuum is about as useful as a broom that won’t sweep. If you rely on your Shark for quick cleanups or deep-cleaning projects, a reliable charger isn’t optional, it’s essential. Whether you’re dealing with a cordless stick model, a handheld, or a robot vacuum, understanding your charger’s type, maintaining it properly, and knowing when to replace it will keep your cleaning routine uninterrupted. This guide walks you through everything you need to know about Shark vacuum chargers in 2026, from troubleshooting common problems to extending the life of your battery system.
Key Takeaways
- A reliable Shark vacuum charger is essential for uninterrupted cleaning, and understanding your specific charger type—cordless dock or plug-in—determines how you troubleshoot and maintain it.
- Clean the metal contact points on your charger dock and vacuum with a dry cotton swab or isopropyl alcohol to resolve the most common issue of the charger not recognizing your vacuum.
- Always purchase a Shark vacuum charger that matches your exact model number from authorized retailers rather than third-party universal chargers, which risk overheating and damaging your battery.
- Remove your vacuum from the dock immediately after it reaches full charge to avoid degrading the battery through extended trickle charging, and store it off the dock during long periods of non-use.
- Replace your charger if you notice burn marks, exposed wiring, or persistent charging failure, and properly recycle the old charger through retailers like Best Buy or local e-waste facilities rather than throwing it in the trash.
Understanding Shark Vacuum Charger Types
Cordless vs. Plug-In Models
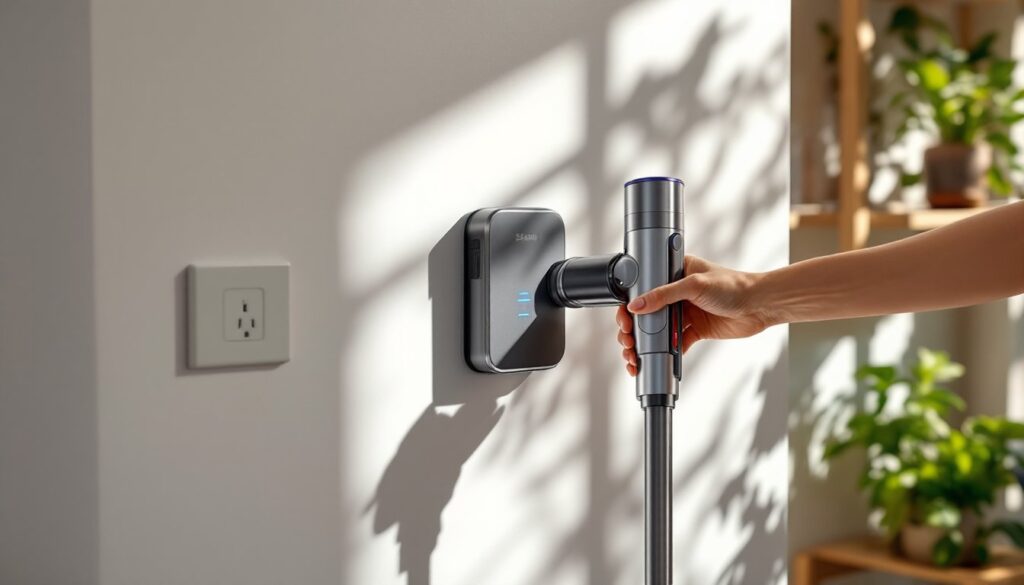
Most modern Shark vacuums use cordless, rechargeable battery systems. These chargers deliver power to lithium-ion or NiMH battery packs, typically through a dock or a wand-mounted contact point. The dock sits on your floor or mounts on a wall, and you slide the vacuum into place to charge. Full recharge times usually run 3–5 hours, depending on the battery capacity and charger wattage.
Older or traditional Shark upright and canister models plug directly into an outlet via a power cord. These don’t require a separate charger, the motor runs on AC current. If you own one of these, you won’t face battery or charging issues, though you’ll be tethered to a cord length.
Which type you have determines how you troubleshoot and maintain charging. Cordless models demand more attention to charger condition because the battery and charger work as a team.
Universal Chargers vs. Proprietary Chargers
Shark makes most of its chargers proprietary, meaning they’re designed specifically for certain battery and vacuum models. A charger for a Shark Navigator cordless won’t fit a Shark APEX: the connectors differ. This is frustrating for owners with multiple Shark machines, but it ensures safe voltage and current delivery to each battery.
Universal chargers do exist in the third-party market, but proceed with caution. A universal charger that claims compatibility with “all Shark models” is a red flag, batteries have different amp-hour ratings and chemistry. Using the wrong charger can overheat your battery, reduce its lifespan, or cause it not to charge at all. Always verify your specific model number and battery type before buying a replacement charger. Check the original charger’s label for voltage (usually 25–29V for cordless uprights) and amperage.
When in doubt, buy directly from Shark or an authorized retailer. The cost difference is minimal, and you avoid guesswork that could damage your vacuum.
Common Shark Charger Problems and Solutions
Charger Not Recognizing Your Vacuum
Your vacuum sits on the dock, but the LED light doesn’t turn on and the battery won’t charge. This is the most common complaint.
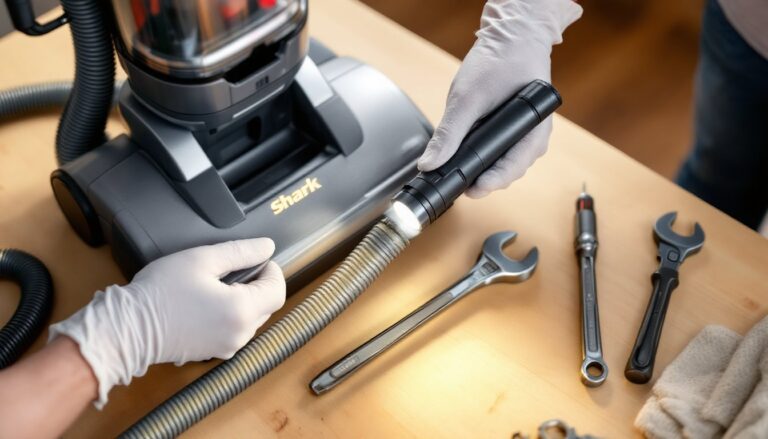
First, inspect the contact points. The metal pins on the charger dock and the corresponding contacts on the vacuum’s battery pack or wand accumulate dust, pet hair, and debris. Unplug the charger, then use a dry cotton swab or a soft brush to clean both the dock contacts and the vacuum’s connection points. Stubborn residue can be gently wiped with a lint-free cloth barely dampened with isopropyl alcohol, no puddles, just a touch of moisture. Let everything air-dry completely before reconnecting.
Next, check the charging cable connection. If your dock is hardwired or uses a detachable cable, make sure it’s firmly seated at both ends. A loose connector between the wall outlet and the dock can prevent power from reaching the contacts entirely.
If cleaning and reseating don’t work, try a different outlet. A tripped circuit breaker or a dead outlet is easy to overlook. Plug a lamp into the outlet to confirm it’s live.
Final step: power-cycle the charger. Unplug it for 30 seconds, then plug it back in. Some chargers have internal protection circuits that shut down temporarily if they detect a problem. A restart clears the fault.
If none of these steps work, the charger or the battery’s contact system may be damaged. That’s replacement territory, continue to the section below on replacing a damaged charger.
How to Properly Maintain Your Shark Charger
Your charger is an electrical device that works hard every day. A few preventive habits add years to its life and keep your vacuum always ready to go.
Keep it dry. Don’t place the charger near sinks, shower steam, or wet areas. Water and electricity are enemies. If you accidentally splash the charger, unplug it immediately and let it dry in a warm, well-ventilated spot for at least 48 hours before plugging it back in.
Avoid heat sources. Chargers dissipate heat while working. Place the dock away from direct sunlight, radiators, or heating vents. Excessive ambient heat reduces charger efficiency and can shorten the lifespan of internal components. A cool garage or closet is ideal: a sunny windowsill is not.
Don’t leave the battery on the charger indefinitely. Once your Shark reaches full charge (the LED typically turns green or stops blinking), remove it. Leaving a fully charged battery connected for days or weeks causes “trickle charging,” which generates unnecessary heat and degrades the battery over time. Use your vacuum when it’s charged: store it off the dock when not in use for extended periods.
Inspect the cord monthly. Look for cuts, fraying, or damage to the charging cable. A damaged cord is an electrical hazard and won’t charge safely. If you spot damage, replace the charger immediately, don’t attempt a repair.
Clean the dock exterior. Dust the charger dock with a dry microfiber cloth every month. Dust buildup can insulate the charger and trap heat, reducing efficiency. Never spray the dock with water or cleaner, a dry cloth is all you need.
According to Popular Mechanics, regular maintenance of power tools and appliances prevents unexpected downtime. The same principle applies to your vacuum’s charging system. Fifteen minutes of preventive care per month saves frustration later.
Replacing a Damaged Shark Vacuum Charger
Sometimes, no amount of troubleshooting brings a charger back to life. Burn marks, exposed wiring, persistent failure to charge, or a visibly damaged contact point all signal time for a replacement.
Identify your exact model. Before buying a new charger, write down your vacuum’s full model number. It’s usually printed on a sticker on the body or in the manual. Look something like “Shark NV360” or “Shark APEX DuoClean AX950.” This matters because Shark has hundreds of model variants, and each may use a different charger.
Where to buy. Shark’s official website and authorized retailers (Best Buy, Costco, Target, Amazon, and major appliance stores) stock replacements. Prices typically range from $25 to $80 for a dock charger, depending on the model and battery capacity. Third-party sellers on Amazon often offer lower prices, but verify the seller’s rating and reviews, counterfeits and incompatible chargers circulate online. When in doubt, buy from Shark directly or an official retailer to ensure compatibility and warranty coverage.
Installation is straightforward. Most dock chargers come with a wall-mount kit. Unpack the charger, position the dock where you want it (near an outlet, out of direct sunlight), and follow the included instructions for mounting or placement. Plug it in, let it power on, and slide your vacuum into place. The LED should respond, usually blinking or turning on to indicate charging has begun.
What about battery replacement? If your battery no longer accepts a charge even with a new charger, the battery itself is spent. Shark sells replacement batteries separately, typically $40 to $150 depending on the model. Good Housekeeping regularly reviews home appliance batteries and chargers, and their reports note that battery replacement is often more cost-effective than buying a new vacuum. If your battery is out of warranty, calculate the battery cost against the vacuum’s current value. If the vacuum is ten years old and the battery costs $120, a new mid-range Shark ($200–$400) might be the smarter choice.
Disposal matters. Never throw an old charger in the trash. Batteries and power adapters contain materials that shouldn’t end up in landfills. Most retailers that sell Shark chargers accept old ones for recycling. Best Buy, for example, has a trade-in and recycling program. Alternatively, check Earth911.com to find a local e-waste facility. It takes five minutes and protects the environment.
Warranty coverage. Most Shark chargers carry a 1–2 year manufacturer’s warranty if purchased new from an authorized dealer. Keep your receipt. If the replacement charger fails within the warranty period, contact Shark customer service for a free replacement. Warranty doesn’t cover misuse, water damage, or damage from using an incompatible battery, but normal wear and manufacturing defects are covered.
Keeping Your Shark Charged and Ready
Your Shark vacuum charger is a simple device doing a critical job. Understanding its type, maintaining it deliberately, and replacing it when necessary ensures your cleaner is always ready to go. Start with the basics: clean the contacts, keep it dry and cool, and don’t leave a fully charged battery sitting on the dock for weeks. When trouble strikes, troubleshoot methodically before assuming the charger is dead. And when replacement time comes, match the exact model and buy from a trusted source. With these habits in place, you’ll avoid the frustration of a dead vacuum when you need it most.
Today’s Homeowner emphasizes that preventive maintenance saves money and extends the life of household appliances, and Shark chargers are no exception. Small effort, big payoff.